With Google Docs merged to Google Drive, a lot of us have cultivated the habit of storing any and every document into Google Drive. After all, its safe, secure and maintained by Google in the cloud.
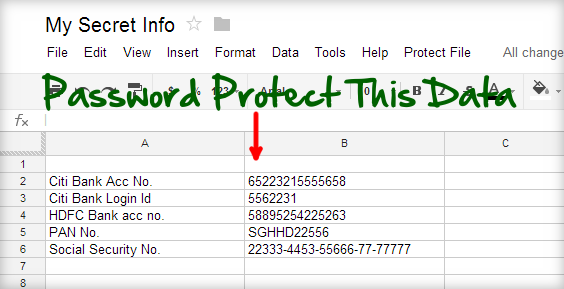
And like a lot of people I also have a spreadsheet having some of the little sensitive info which I need to access now and then. Something like a bank account number, login ids, social security number etc which I can look-up using the Google Drive app on my phone.
There is a small problem here. Although Google Drive can only be accessed after logging into Google, we are almost always logged into Google in our phones and PCs. That means if somebody gets access to your PC or phone momentarily, he/she can actually take a peek at these… not too good!!!
Password Protected Google Spreadsheet.
The best solution to this problem would be to have Google Drive ask for a password each time you open a document. Unfortunately, Google doesn’t provide such a protection feature in-built. But you can achieve the same using the password protected Google Spreadsheet which uses Google Scripts. Here’s how to use it.
- Open and make a copy of ProtectedSheet Google spreadsheet. You can rename it to any name you want.
- Next select “Tools->Script Editor”. This will bring up a script in a new window or tab.
- In this window, select “File->Manage Versions” and click on “Save a new version”. You can leave all fields blank. A new row for version 1 will appear. Just click “OK” button.
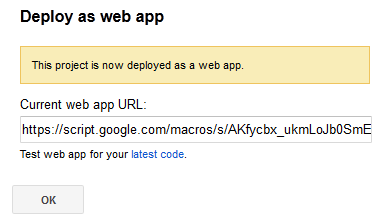
- Now select “Publish->Deploy as webapp” and click on the “Deploy” button.
- You will now be shown a confirmation that you app has been deployed as a web app.

- Now close this window and come back to the spreadsheet tab or window. You will find a new menu item “Protect File” in the spreadsheet. Select “Protect File->Initialize” and provide required permissions.All the above steps are one time only. You have now fully setup your password protected document.
- Now you can add what ever you want to store securely into the document. Just make sure you leave the first two colored rows intact.
- To secure the document, select “Protect File -> Encrypt File”. You will be asked to enter a password. Once done, this will scramble the content each cell in the document. Now your data is fully password protected and nobody can read it without having the password you have set.
NOTE: This password is not your Google account password, but any password you can choose. The first time you run “encrypt”, you will be asked to set a password which will be used for all further encrypt/decrypt requests. - When ever you want to decrypt your document, open it and select “Protect File -> Decrypt File”. You will be again asked for the password giving which it will decrypt and bring back the cell contents which you can read or edit.
This works well if you are opening the spreadsheet in a PC. But if you are opening it from a phone, Google always loads the phone version and you won’t get the “Protect File” menu. To encode/decode your spreadsheet from a phone, click on the encrypt/decrypt URL which will be present in the first row. This URL gets created and added once you deploy the web app in step 4 above.
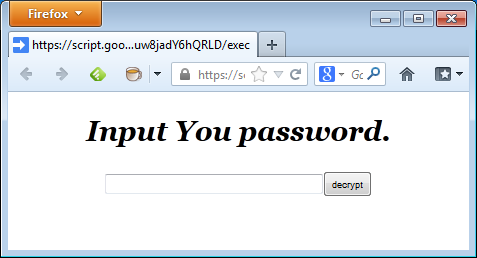
On loading the URL will show a web page where you can enter your password to encrypt or decrypt the document. Once done, a “Go back” link will appear which you can click to load the encrypted/decrypted spreadsheet.

You can also change the password anytime using “Protect File -> Change Password” menu option. Please make sure you don’t edit and change the encrypted document. If you do so, the decryption won’t be able to give back the original content. And as always, the script is your local copy and runs entirely in your Google account. Nobody else has access to anything including the password you set.
How it works.
On clicking the encrypt menu, the script checks the password with what you have set. Only if it matches, the contents of the Spreadsheet is read and text in each cell is obfuscated. On clicking Decrypt, the same algorithm converts the obfuscated text back to the original text if the password matches.
Finally, here’s a video to see Google document password protection in action.
The decrypt from the URL doesn’t work – I get:
TypeError: Cannot read property “url” from null.
Are you sure that you haven’t missed any of the setup steps?
Please rerun them and let me know if you still have problems, so I can check further details.
Are you sure that you haven’t missed any of the setup steps?
Please rerun them and let me know if you still have problems, so I can check further details.
Following threads like this, we decided to build password protection for files in Drive;
You can now password protect any file in Drive; using Armor by Innovode.
http://www.innovode.com/armor
Integrated into Drive, select and encrypt any file.
Click on the encrypted file, and use/edit it within drive. Changes are encrypted.
Offering AES-256 encryption and password protection, we think anyone putting sensitive files on drive should seriously consider Armor. (Free trial)
Great post! This worked like a charm. Thank you very much for such detailed instructions!
Actually, we should all thank Arun SK for those steps 🙂
Hi everyone, this tutorial looks awsome… but I have some concerns, who did this protected file ? I’m sorry, are you the developer who created that file?
It’s just that in the part where the scripts ask for permissions, it says something like “Manage all your files in Google drive, even without you”… and I’m a little worried, to give more ? information to Google, or who I’m giving access and why ‘all the files’, if I just one to protect this very file?
It was created by Arun SK from http://www.skipser.com as mentioned in the article.
You are correct the script needs to access your drive in order to make the encryption. You can check the code yourself in the script editor to make sure that it is safe before deploying the app.
Please let us know if I missed anything when I checked it.
This worked perfectly. I feel so smart now. Thanks for the seamless instructions.
Hi,
I have done until step 5, but unfortunately i could not find any new menu ‘ protect file’ as mentioned. Kindly please assist
This means that the steps 4 and 5 are not finished successfully.
Please redo the steps and let me know if you still have the same problem, so I can check the issue more thoroughly.
I did all the steps as mention but did not get the next tab as Project file. Kindly reply.
Are you sure that the step 4 is launched without any problems?
Please try the steps again and let me know if you still have problems, so I can check more thouroughly.
I went through the whole process but accidentally ran over the words in the green. So i deleted the file. Now when i go to start over it won’t let me deploy as web app.
You should be able to save it using a new version number, please try it and let me know if you still have a problem, so I can make further tests.
What about sharing the encrypted file with others. Do they need to install this script on their google drive account as well to encrypt/decrypt ?
The file should not look ok for the second party, so I think they should consider using the same technique from their side.
I’m trying to encrypt some form responses using this method – basically, the email account is shared but I don’t want everyone who has access to the email to be able to access these specific form responses.
However when I used your method, it encrypted fine but while encrypted wasn’t logging new form submissions.
Can this be used on form responses?
I don’t think this method should do the trick. You can create a new form and share it while the data stays private for you. You can check this link for a basic example steps:
http://www.workhappy.net/2009/05/using-google-docs-to-make-a-survey.html